

Amazon Relational Database Service

I am a front-end mobile and web developer. I am an AWS Community Developer. Just a guy Sharing things
Introduction
Amazon Relational Database Service (Amazon RDS) makes it easy to set up, operate, and scale a relational database in the cloud. Before launching actual RDS instances, you need to configure a DB Subnet Group.
Subnets are segments of a VPC's IP address range that allow you to group your resources based on security and operational needs. A DB Subnet Group is a collection of subnets (typically private) that you create in a VPC and designate for your DB instances. Each DB subnet group should have subnets in at least two Availability Zones in a given region. Note that SQL Server Mirroring with a SQL Server DB instance requires at least 3 subnets in distinct Availability Zones.
When creating a DB instance in a VPC, you must select a DB subnet group. Amazon RDS uses that DB subnet group and your preferred Availability Zone to select a subnet and an IP address within that subnet to associate with your DB instance. When Amazon RDS creates a DB instance in a VPC, it assigns a network interface to your DB instance by using an IP address selected from your DB Subnet Group. If the primary DB instance of a Multi-AZ deployment fails, Amazon RDS can promote the corresponding standby and subsequently create a new standby using an IP address from an assigned subnet in one of the other Availability Zones.
You can create an RDS Subnet Group using the RDS launch wizard.
Instructions
1. In the AWS Management Console search bar, enter RDS, and click the Aurora and RDS result under Services:

2. From the RDS dashboard, click Subnet Groups from the left-hand menu:
3. Click Create DB Subnet Group to open the creation wizard:

4. Fill out the form using the following data:
Name: mysubnetgroup
Description: rds-lab
VPC ID: select the available one
Warning: You may have to manually select the VPC from the drop-down menu even though it is automatically selected; otherwise, subnets may not be available to select in the following instructions.

5. Select all the AZs and the subnets available from the dropdown menu and then click Create:

Set up Security Group control rules for connecting to the RDS Instance
To allow incoming traffic from EC2 instances to the RDS instance within the same VPC, we must configure the appropriate security group rules. The rules of a Security Group control the inbound traffic allowed to reach the instances associated with the security group, as well as the outbound traffic allowed to leave them. By default, security groups allow all outbound traffic and deny all inbound traffic.
You can add new rules to a VPC Security Group using the AWS Management Console.
1. In the AWS Management Console search bar, enter VPC, and click the VPC result under Services:

2. In the left navigation panel, select Your VPCs. Examine the details that appear in the IPv4 CIDR column – this shows you the IP address range of your VPC.

3. In the left navigation pane, click Security Groups. Click on Create security group.
5. Fill the creation form as described below:
Security group name: rds-launch-wizard
Description: rds-launch-wizard
Inbound rules: click on Add rule
Type: MySQL/Aurora
Protocol: TCP
Port: 3306
Source: (Custom) - 172.31.0.0/16 (IP address of the VPC Shown on step 2)

6. Click Create security group, and you will be ready to connect to your RDS instance inside the VPC.
Creating a Database Using RDS
Introduction
Amazon Relational Database Service (Amazon RDS) makes it easy to set up, operate, and scale a relational database in the cloud. Amazon RDS is designed for developers or businesses who require the full features and capabilities of a relational database or who wish to migrate existing applications and tools that utilize a relational database. It gives you access to the capabilities of a MySQL, Oracle, Microsoft SQL Server, MariaDB, Amazon Aurora, or PostgreSQL database engine.
The RDS service is fully managed by Amazon. RDS will make sure that the database software stays up-to-date with the latest patches and any faulty compute instance powering your database deployment will be automatically replaced in the event of a hardware failure.You can automatically or manually create database snapshots and easily scale your infrastructure up or down using the AWS Management Console.
You can launch an RDS instance using the RDS launch wizard.
Instructions
1. In the AWS Management Console search bar, enter RDS, and click the Aurora and RDS result under Services:
2. Click Databases on the left menu, followed by Create database:

The Create database wizard appears. You will only be instructed to set values that need to be changed from the default values. Leave any unspecified values at their defaults. Click on info to read more about any setting in the wizard.
3. Under Choose a database creation method, ensure that Standard Create is selected:

You will configure all of the database settings up-front using this method.
4. Choose the MySQL database engine and leave the version as the default selected:
5. Select Sandbox as the creation template.

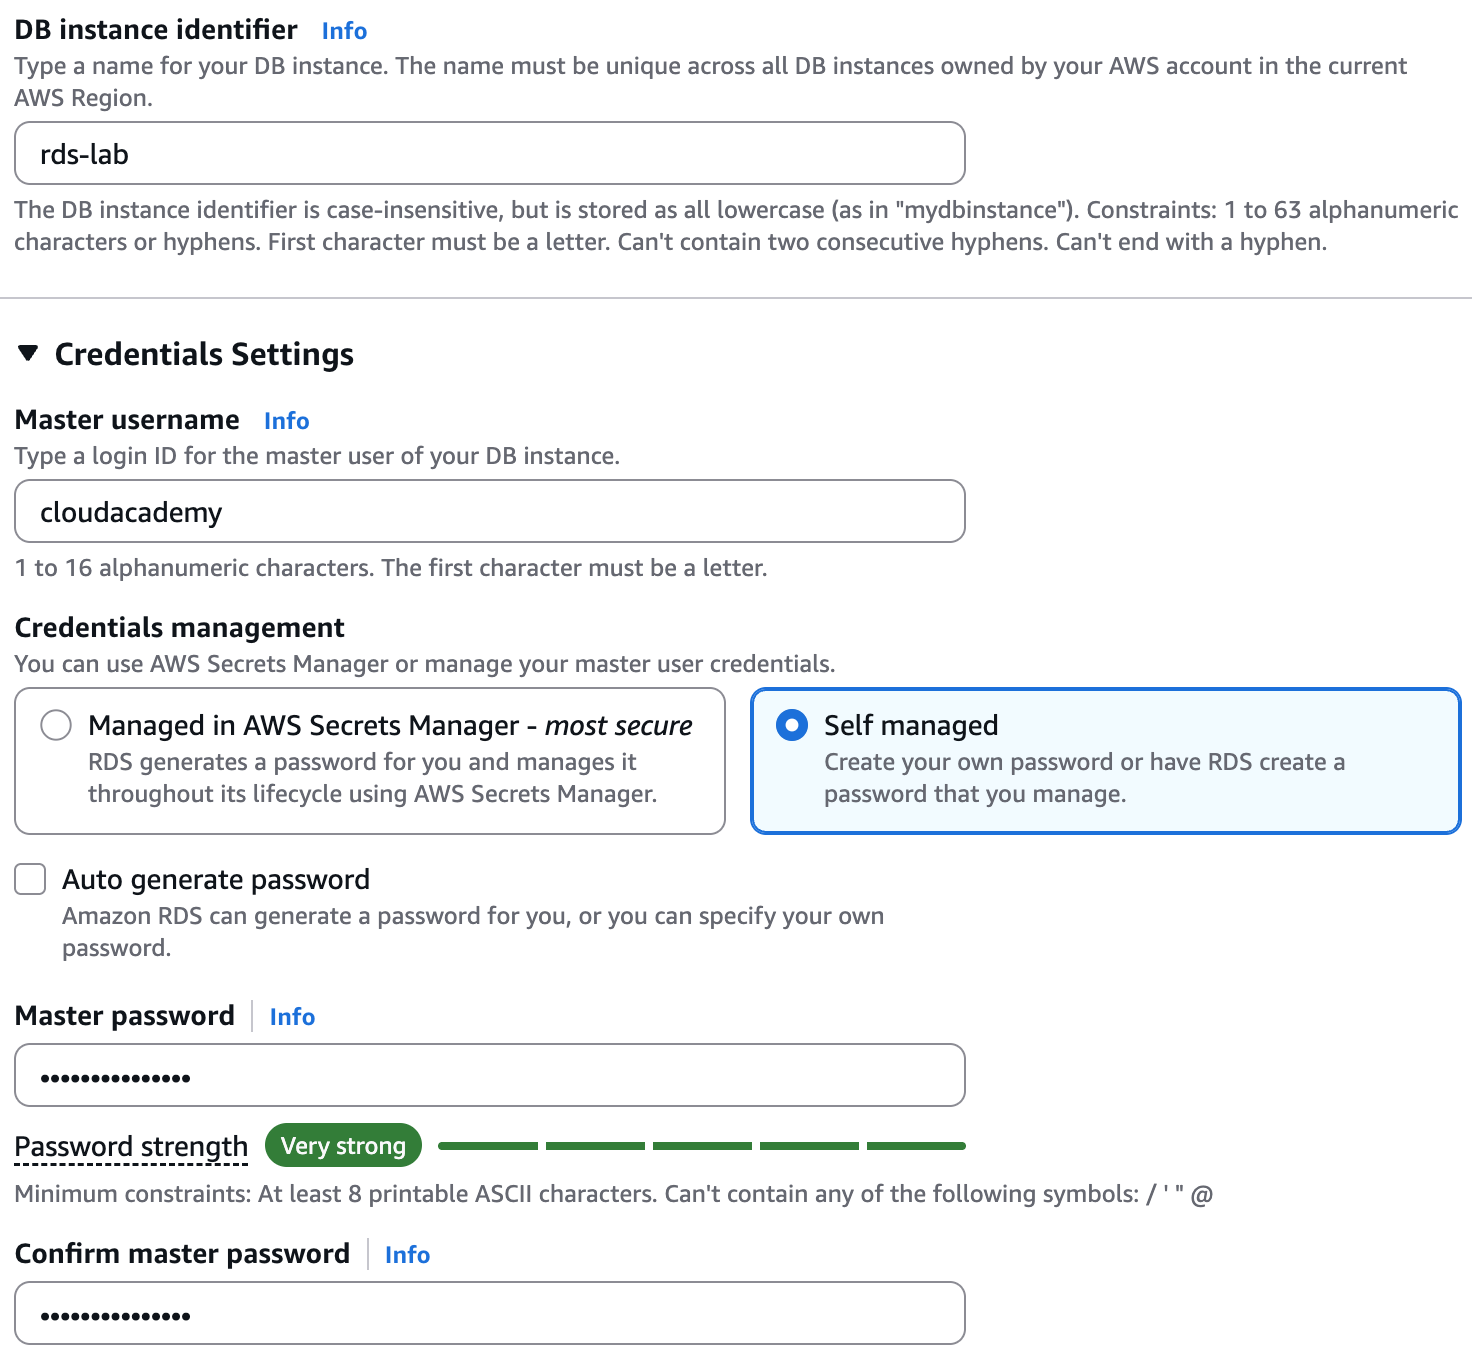
6. In the Settings section, set the following options:
DB instance identifier: rds-lab
Master username:admin
Master password: myStrongRDSpwd!
Confirm master password: myStrongRDSpwd!
7. In the Instance configuration section, configure the following:
Enable the Include previous generation classes option.
DB Instance Class: Select Burstable classes and select
- db.t3.micro
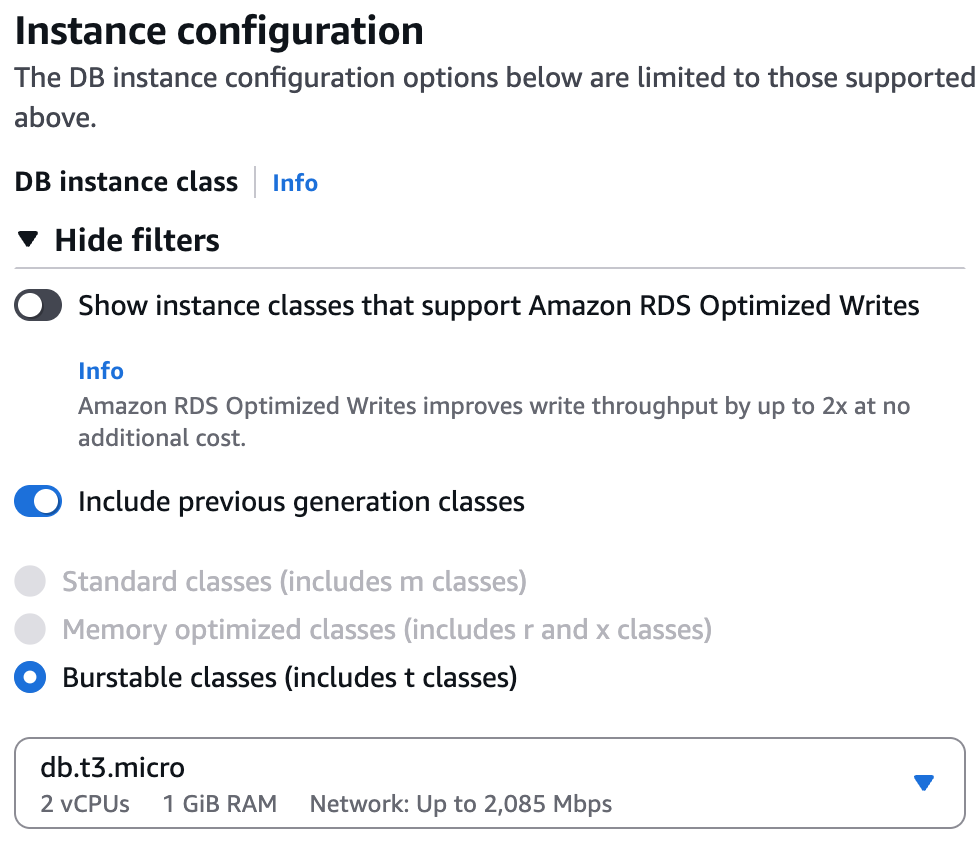
The db.t3.micro has modest specs but is sufficient for this lab.
8. In the Storage section, set the following option:
Allocated Storage: 20 GiB
Expand the Additional storage configuration section
Uncheck the Enable storage autoscaling option
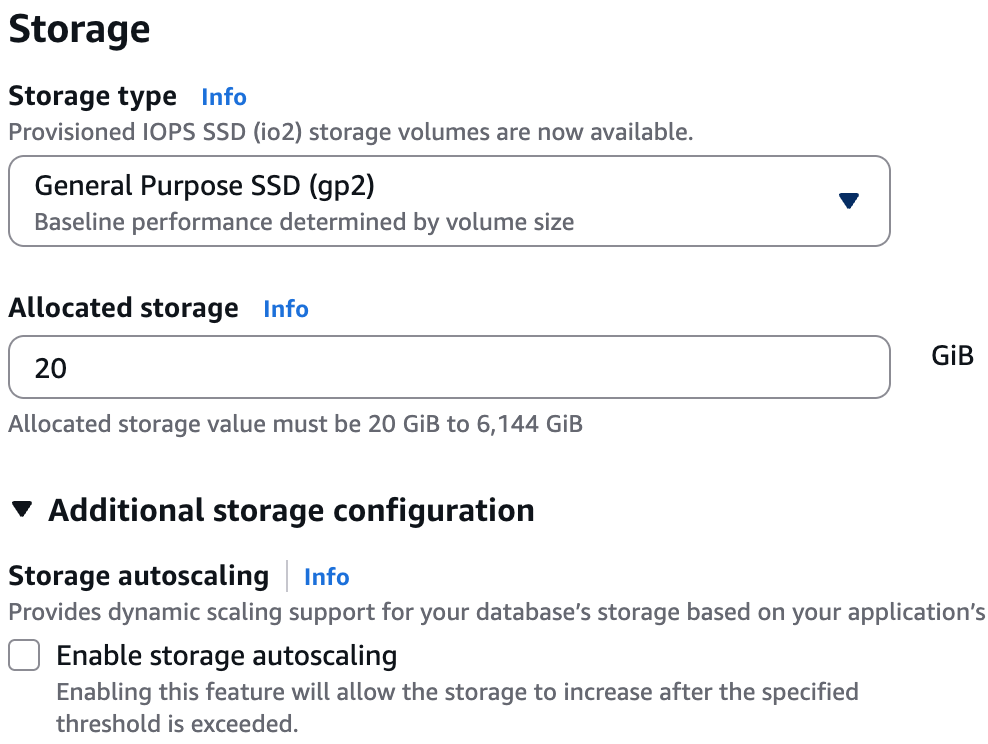
Consider using provisioned IOPS as the Storage type to guarantee consistent throughput levels for production workloads.
Storage autoscaling can also be useful in production to avoid manually scaling up the database's storage when it breaches a certain threshold. Neither is needed for this lab.
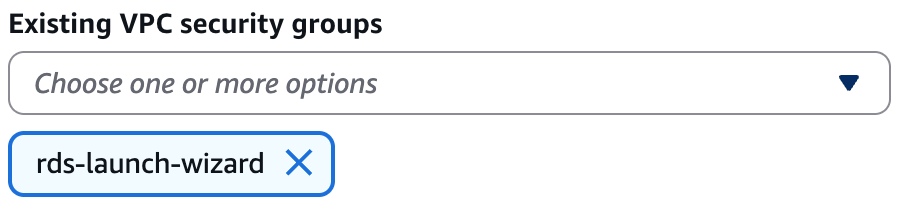
9. In the Connectivity section, provide additional information that RDS needs to launch the MySQL DB instance:
- Existing VPC Security Group(s): Select the rds-launch-wizard
10. In the Monitoring section, uncheck the Enable Enhanced monitoring option if it is currently checked.:

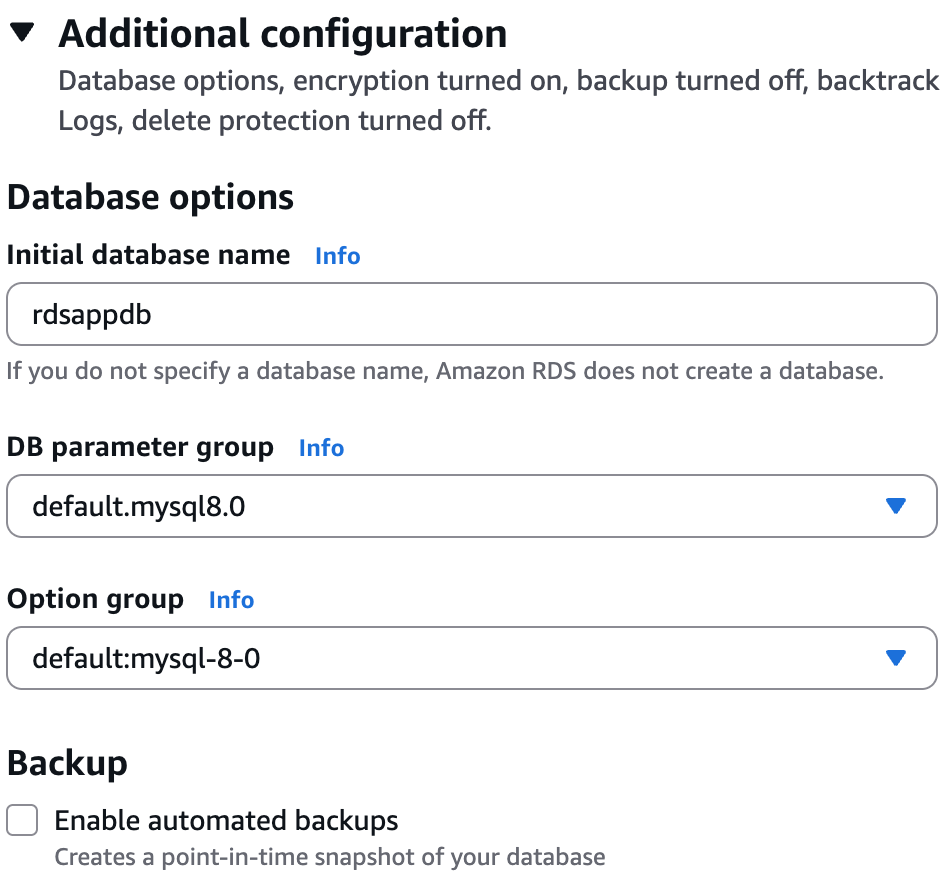
11. Expand the Additional configuration section and configure the following settings:
Database options
Initial database name: rdsappdb
Uncheck the Enable automatic backups option
12. Uncheck the Enable deletion protection option if it is currently checked:

13. Click Create database.
The Databases view will display your database:

RDS instance creation requires up to 10 minutes for completion. Wait until its status becomes Available.
Starting an AWS Systems Manager Session Manager Browser Shell Session
Session Manager is part of the AWS Systems Manager suite of tools for gaining operational insights and taking action on AWS resources. Session Manager gives you browser-based shell access to EC2 instances running the Systems Manager agent. Both Windows and Linux instances are supported. Session manager provides secure access to instances without the need to distribute passwords or SSH keys. Session Manager also allows you to connect to instances without having to open any inbound ports. All communication is encrypted, and IAM policies can restrict access to sessions running in Session Manager.
Connecting to RDS and Creating a Database Table
Introduction
Your RDS instance is ready and accessible from any EC2 instance created within the same VPC, so you can use your Session Manager session to connect to the database. In this lab step, we will connect to your RDS instance and create a database table.
Instructions
1. In your Session Manager shell session, enter the following command to change to the default Amazon Linux user (ec2-user) running in a bash shell:
sudo -i -u ec2-user
2. Install the MySQL client by entering:
sudo yum -y install mysql

This will install the necessary tools to interact with your RDS instance. In Amazon Linux, the mariadb package is installed. The MySQL command-line client is included in the mariadb package.
You are ready to connect to your RDS instance using the RDS endpoint URL. It's automatically generated during the RDS instance creation, and you can find it in the RDS database connectivity & security box.
3. Navigate to the RDS Databases, opens in a new tab:

4. Click the DB identifier of the RDS instance you created, and in the Connectivity & Security section that appears, take note of the Endpoint:

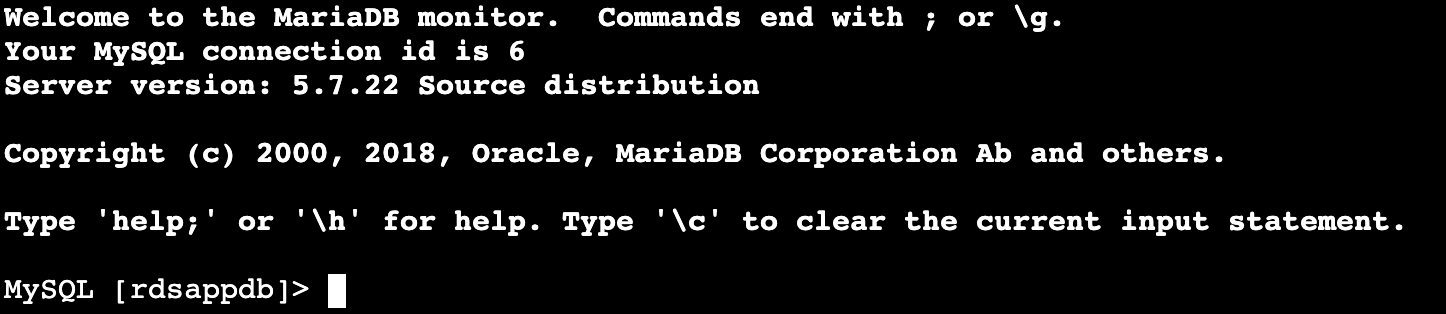
5. In your session, run the following command, replacing <your.endpoint> with the endpoint you noted earlier:
mysql -h <your.endpoint> -u admin -p rdsappdb
This command connects you to the database using the username specified by the -u flag and the database name using the -p flag.
6. When prompted, insert the Master RDS Password:
myStrongRDSpwd!
7. Create a new table by executing this command:
CREATE TABLE laboratory ( id INT, name VARCHAR(100) );

8. Verify that your table was created by executing this command:
DESC laboratory;

9. Close your database connection by executing this command:
quit;
Deleting an RDS Database
Introduction
You will now delete the RDS database using the AWS Management Console.
Instructions
1. From the RDS Console, click Databases in the left menu.
2. Click on your database instance in this case, rds-lab
3. Click on Actions > Delete:

4. Uncheck the Create final snapshot checkbox, check the acknowledgment checkbox, and enter delete me in the confirmation text box before clicking Delete:

Your RDS instance is now in the Deleting status. The deletion process can take up to 8 minutes to complete.
Summary

